How Follow-up Messages Work & how to Replace and Edit Existing Templates
Follow-up messages are sent to the members that accepted to connect with you, or are already a 1st connection contact.
When attaching follow-up messages to a campaign, set the number of days the follow-up message should be sent.
For example:
If a member connected on June 1st, and the first follow-up message is set to be sent +1 day, it will be sent on June 2nd.
If the second follow-up message is set to be sent for +7 days, it will be sent on June 8th.
NOTE: All follow-up messages will be sent based on the connection date and not on the previous follow-up message date.
How to edit existing dates on a campaign?
To change the existing follow-up messages dated (e.g. change +7 days to +6 days), you need to
First, make sure to stop your campaign.
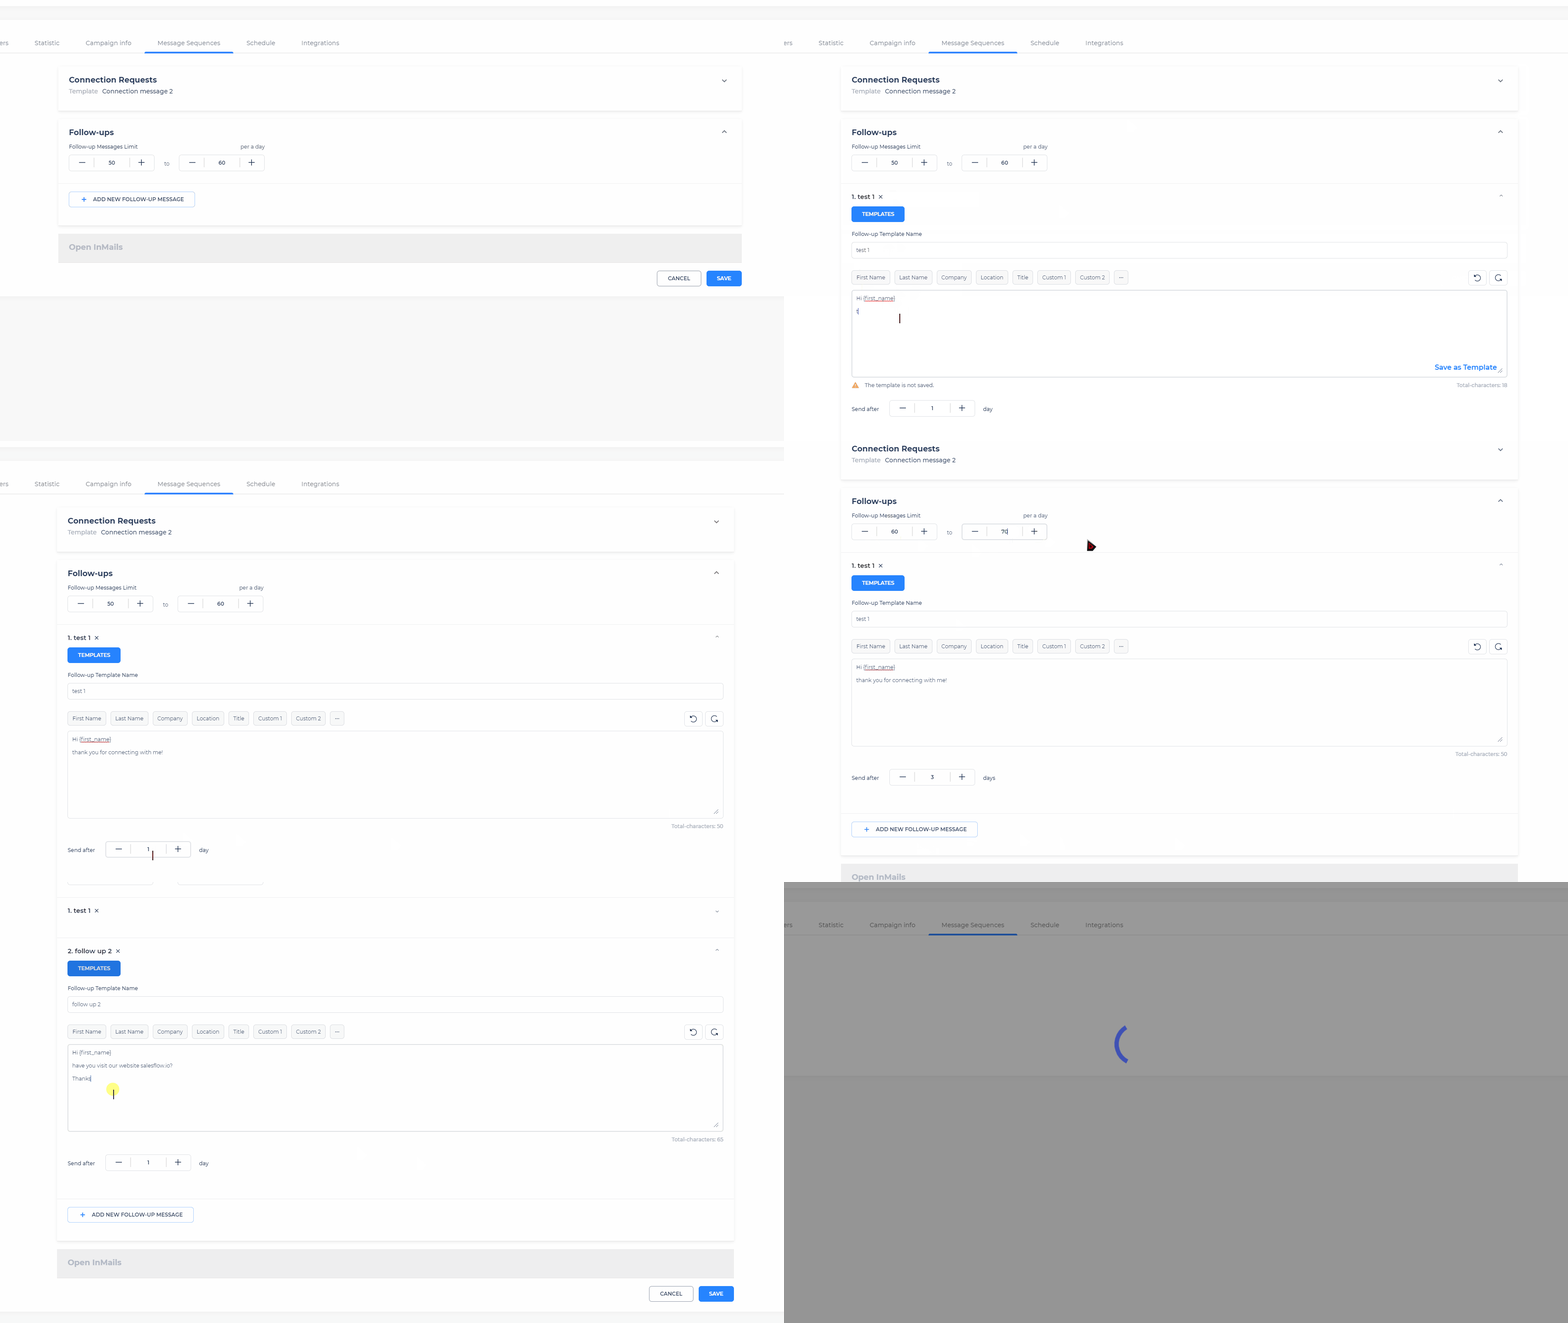
Click on the Message Sequences tab
Then, remove the existing Follow-Up messages
Once the Follow-Up messages have been removed, add a new one with the new day's range.
NOTE: Removing the existing follow-up messages will delete all due dates for all pending follow-up messages in a campaign, hence why we cannot simply edit the date directly.Save and restart your campaign.
Once you add the follow-up messages with the new days set, the due dates will be rescheduled, however, this action will cause some contacts that already received a Follow-Up message, to receive the same Follow-Up message again. When we replace the Follow-Up message, the system understands that this is a new template and will send it to all the contacts again.
How to edit existing templates on a campaign?
If you would like to make changes into the template, instead of replacing it for a new one, you can make the edits to the existing one. This will prevent contacts getting the same message twice.
Note: Please keep in mind that If you add a new message template to the sequence, that new template will be sent to all unmuted contacts, even those that have completed the sequence, if you wish to make big changes to the message sequence, please start a new campaign instead.
To do so:


